Workspaces
Every project/repo lives in a workspace. When you create your account on LOC, a personal workspace is automatically created for you. But you can create as many workspaces as you want. They are a great way to not only organize your work, but also manage your team and collaborators.
Switching workspaces
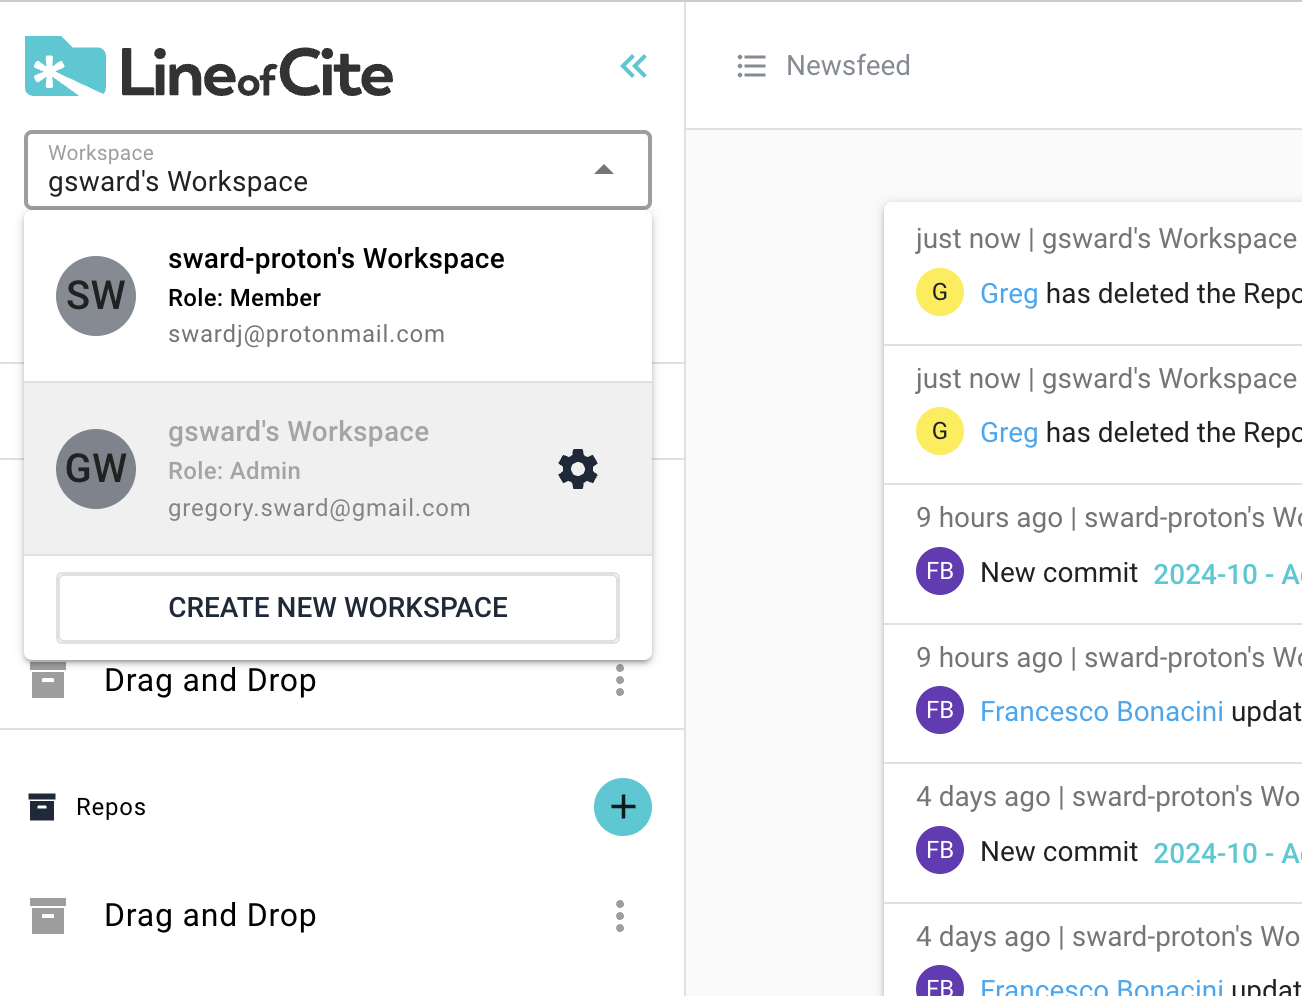
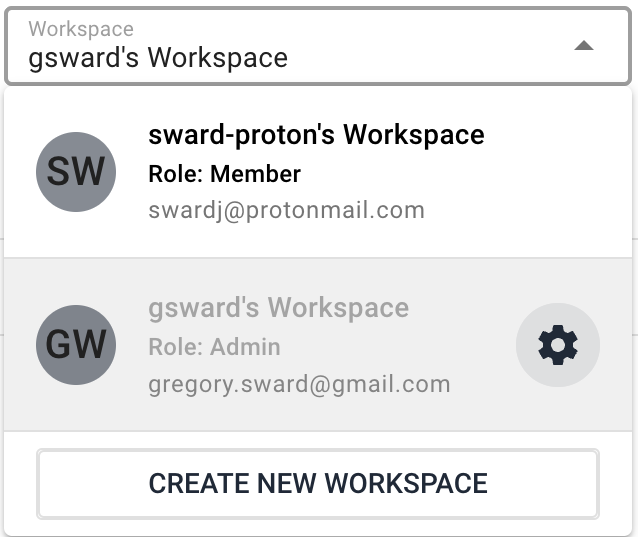
You can view your workspaces by clicking the drop-down in the top-left and then you may select a workspace.
Creating a workspace
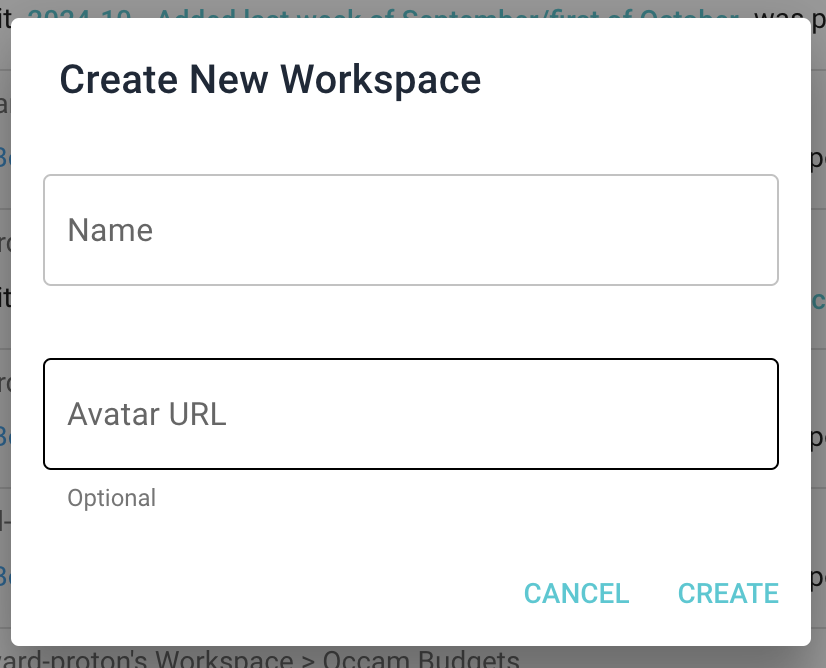
To create a new workspace, select the workspace dropdown and click 'Create New workspace'.
Inviting and Managing Users
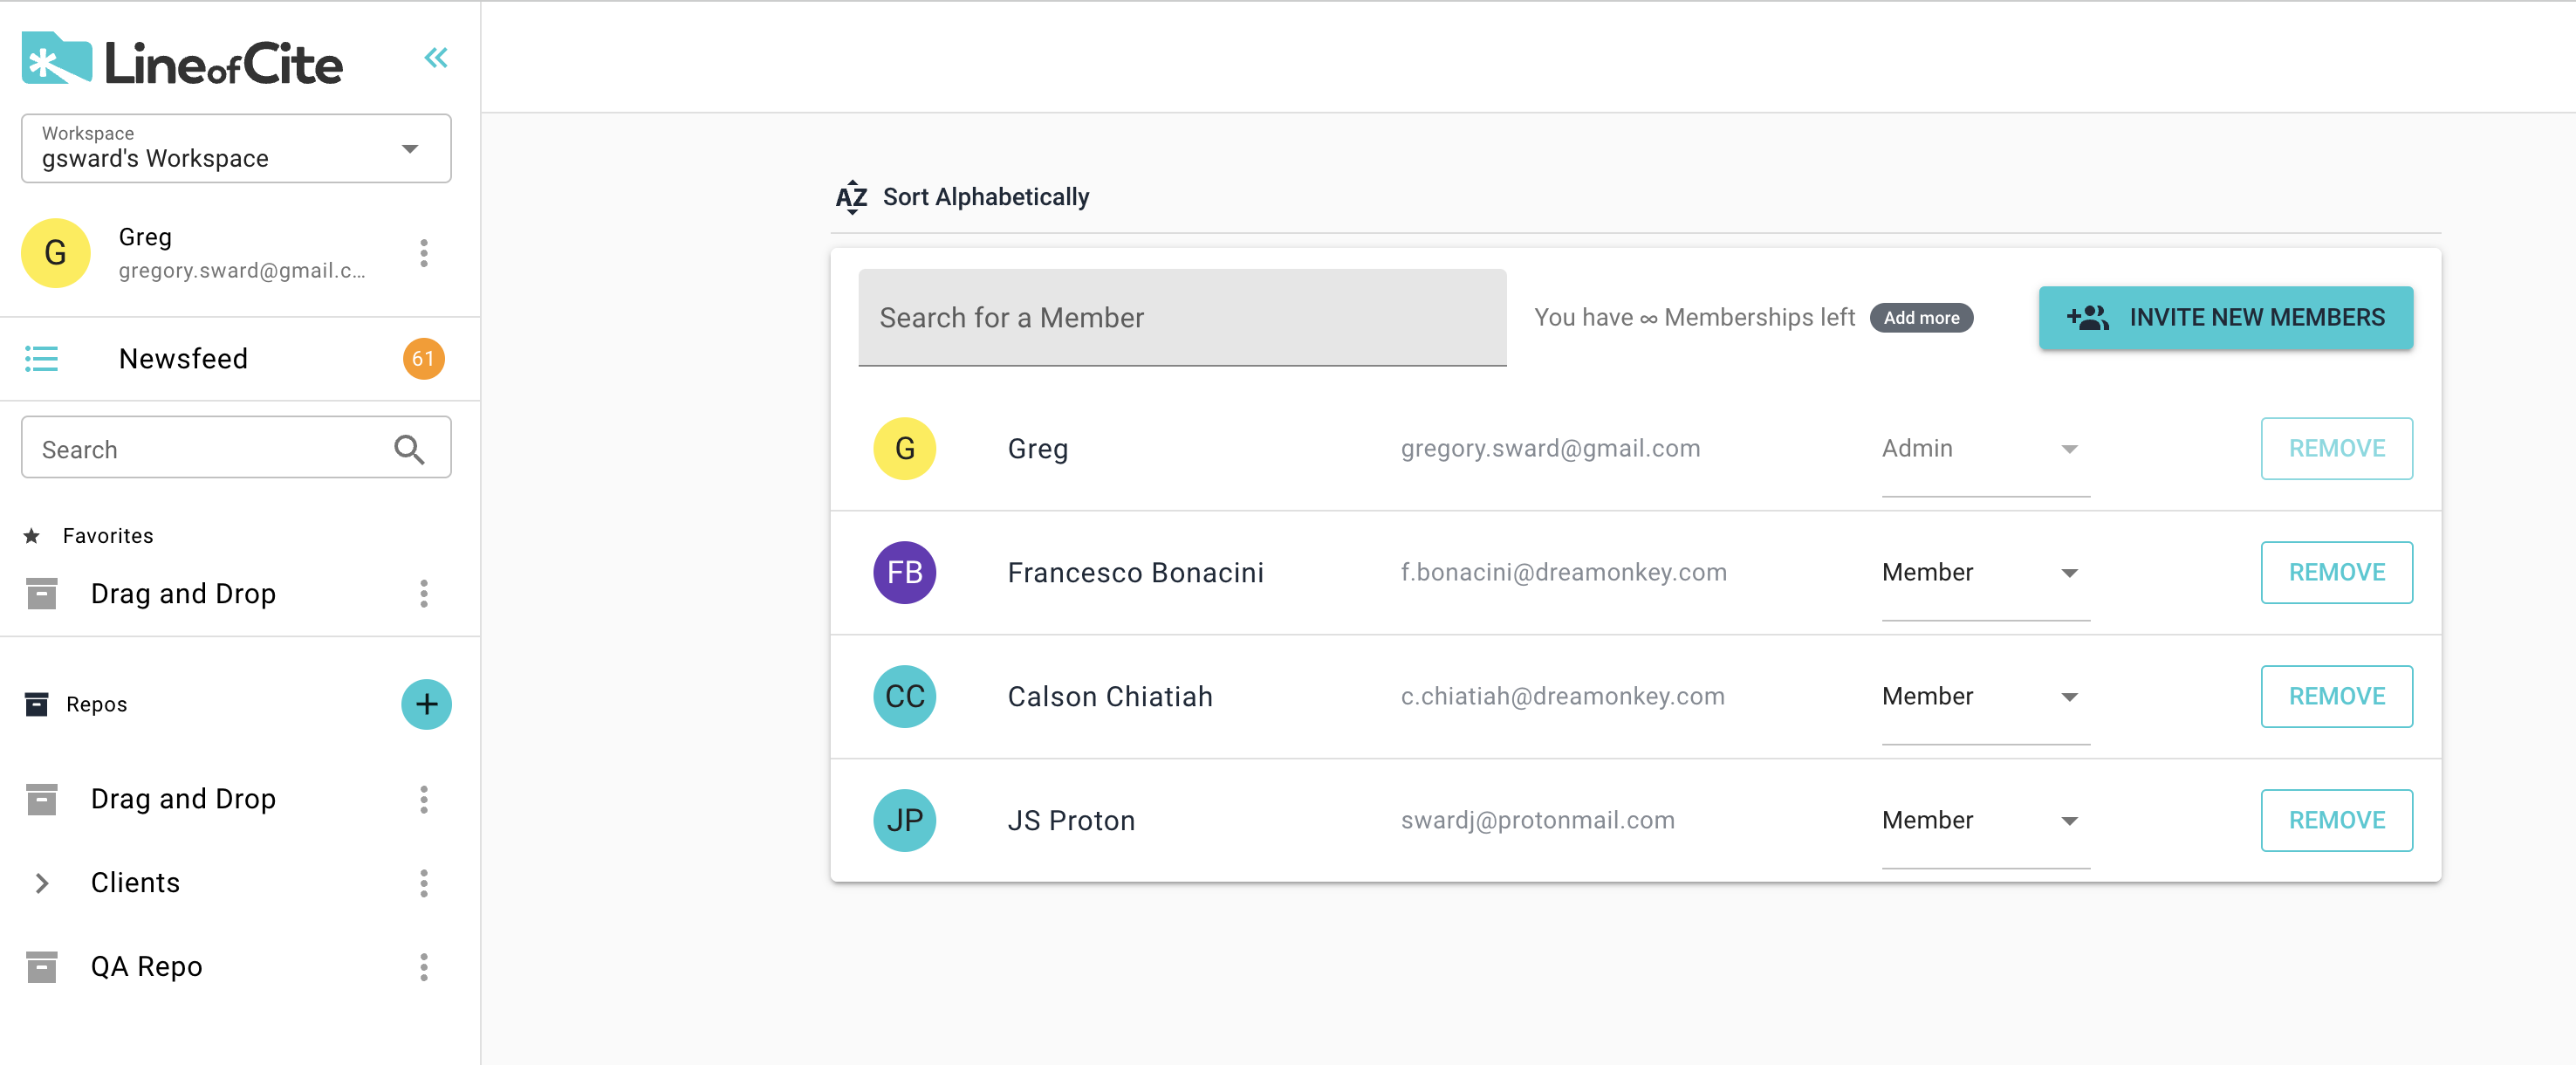
To invite users to your workspace, go into workspace settings. To do this, select the workspace dropdown menu and select the gear icon next to the workspace.
Here you can invite new users, remove users, and assign/modify user roles.
User Roles
There are two levels of permissions in LOC: workspace Permissions and Repo Permissions. Everyone who has access to a repo needs some level of permission to both the repo and the workspace. When you invite a user to a repo, they are by default, a member of your workspace. Members can only access the repos to which they've been added, and what they're allowed to do inside the repo is determined by their repo permissions. In other words, a member can be invited to multiple repos, and have different permissions for different repos. Typically, most of the collaborators in a workspace are members. However, there are often some users that should have access to all projects. For these users, it is better to give them a Manager or Admin role for the workspace. The different workspace level roles and permissions is described below, and the different repo level permissions is described here.
| Role | Permissions |
|---|---|
| Admin | Admins can full access to all repos in the workspace. They can invite and remove users from the workspace. They can create and delete repos in the workspace. A workspace can have multiple admins. |
| Manager | Managers similar to Admins, but cannot invite and remove users. |
| Member | Members cannot create or delete repos. They need to be added to a repo in order to access it. |
Note
When you create a LOC account, you get a personal workspace. You are a admin of this workspace, you cannot change this role.
Suggestions for Organizing workspaces
Organize workspaces by team members and collaborators rather than purpose. Sometimes these are one and the same, but sometimes not. Often, the best workspace arrangemenets mirror the org chart. It's sometimes tempting to create different workspaces for different types of projects, but you can organize your repos within groups inside a workspace. For example, you can have a Finance workspace, and within the workspace have a group for Budgets, and one for Forecasts, and within those groups.
Tip
Organize workspaces by teams rather than project types. This makes permission management, project management, and team management easier.
graph LR
  A[Finance workspace] --> B[Budgets Group];
  A --> C[Forecasts Group];
  B --> D[Marketing Budget Repo];
  B --> E[R&D Budget Repo];
  B --> F[Capital Budget Repo];
  B --> G[Operating Budget Repo];
  C --> H[Revenue Forecast Repo];
  C --> I[Financing Forecast Repo];